There are times when you may need to share your files, folders, or even entire storage to any network. In such a case, mapping the network drive is the optimal solution. It has many benefits which make working and accessing data easier and quicker than ever. Moreover, it also enhances the security of the drive and prohibits unauthorized random access. Hence, to learn everything about map network drive, its benefits, and methods of sharing, read this complete blog.
Introduction To Map Network Drive
A network drive is basically an in-built storage present in a computer system or server. It can be accessed only by using a computer network. In addition to mapping, the network drive allows a number of people to have hands-on shareable data, store information, or manage existing files. Plus, you can access all the features of map shared drive remotely until you are connected to the same network as the drive.
Apart from all this, the three core elements of a map network drive are drive, drive technology, and drive access protocol. Therefore, the types of drive are local drive, network drive, and mapped drive. On the other hand, network drive technologies include file servers, network-attached storage, and cloud network drives. Furthermore, talking about the network drive access protocols include server message block, network file system, and common internet file system.
How to Map a Network Drive?
There are various ways to map the shared drive, as it varies depending on the operating system you own. Hence, to know the steps according to that only, read the below-shared steps:
1. For Windows 10 or Windows 8
The steps for mapping a network drive in a system with Windows 10 or Windows 8 operating system are as follows:
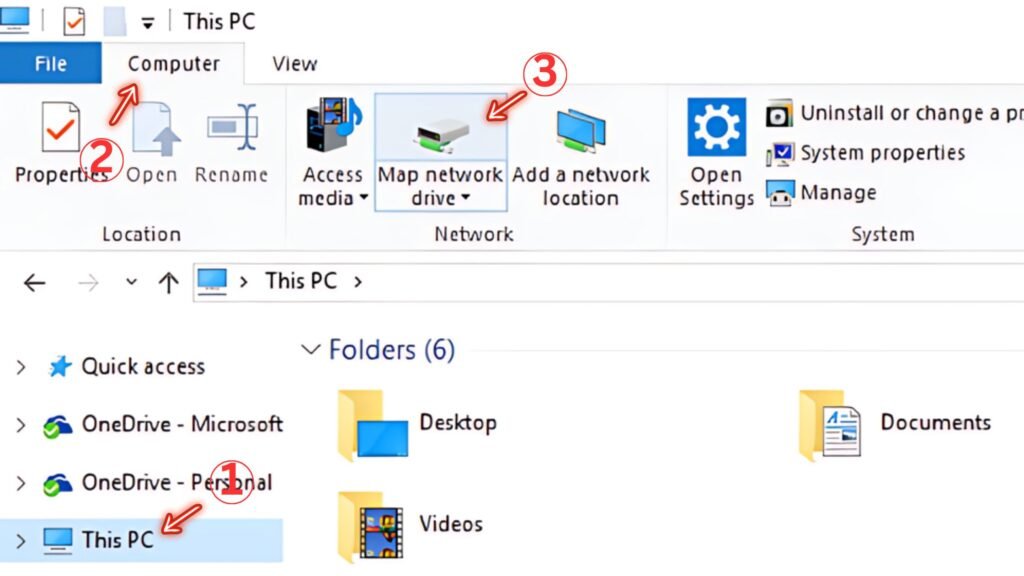
- First of all, you need to click the start button and find “This PC” in the search box.
- Once you open that, click on “computer,” which is present next to the file options.
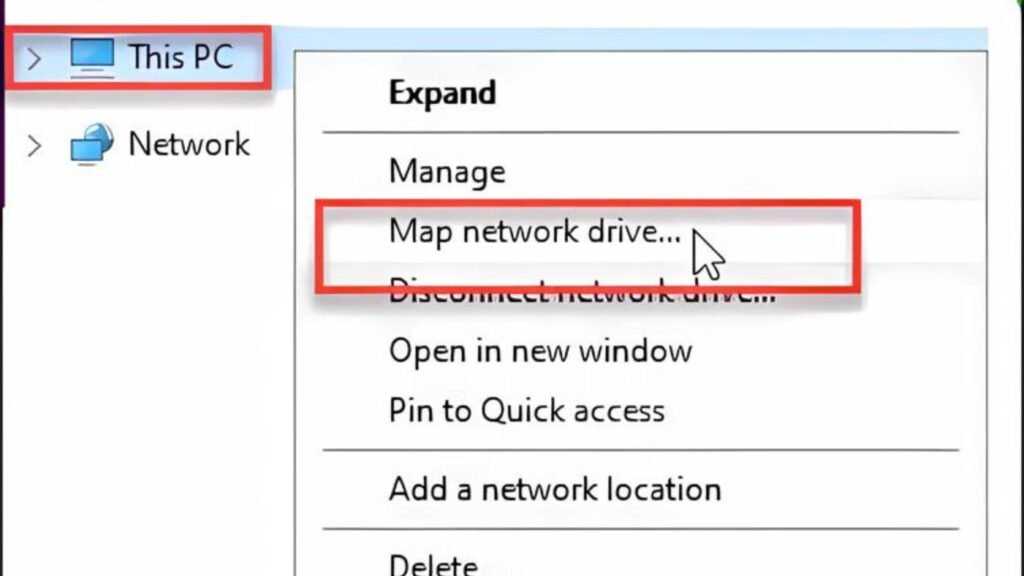
- From there, select “Map network drive” and then select any available letter from the given Drive list.
- After that, mention the path of the shared network folder in the “folder” box. The format of this should be \hostnamesharename. Besides this, you can also browse and select the folder for mapping.
- Finally, click on “Finish” and you are done with mapping your network drive under “This PC”.
2. For Windows 7 or Windows Vistas
If you own a Windows 7 operating system and want to map a network drive, follow the steps mentioned below:
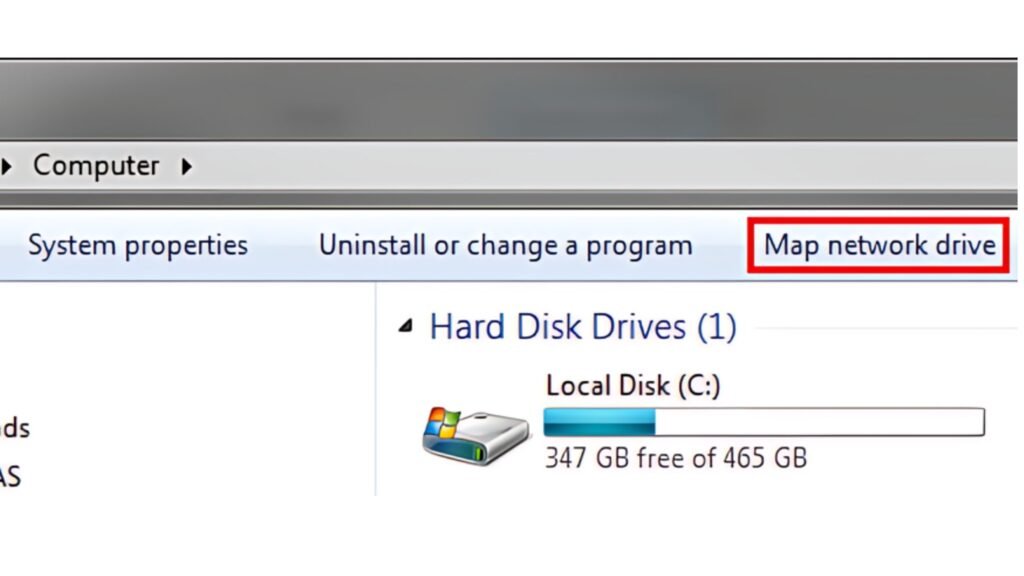
- Firstly click on “start” and then tap “Computer.”
- Now, select “Map network drive,” which is present in the top right corner.
- After that, choose the letter available from the drive list.
- Once done, mention the path to the shared network folder in the “Folder” box with the format \hostnamesharename. Moreover, you can also browse and select the folder.
- At last, click on “Finish” and your network drive will successfully map under the “Computer” section.
3. For Mac
Thus, if you own a MacBook and want to map network drives, follow the easiest steps listed below.
- Begin with opening the “Finder”.
- Now, press “Command + K” or click on “Go” and choose “Connect to server” as the last option in the drop-down menu.
- Once done, click on “Server Address” and start mentioning the IP address or URL of the network drive that is supposed to map.
- After that, click on the “Connect” option. The system may also ask for credentials so fill that appropriately.
- With this you are done with network drive mapping. It will be located either on your desktop or under the “Locations” menu of “Finder‘ window.
Pros and Cons of Map Network Drive
Just like every other software, program, file, or hardware, Map Network Drive also has some advantages and disadvantages. These characteristics affect the user behavior, working style, and selection criteria as well. Therefore, to learn more about them, go through the sections below.
Advantages
Below are the bullet points highlighting the benefits or pros of using a mapped network drive:
- Allow all the devices connected to the same network to access files present in the drive.
- Makes data management easier and simplified.
- Boost productivity and decrease file duplication load.
- Make working more flexible from any location with internet service.
- Take backups on a regular basis to deal with data loss incidents.
Disadvantages
Now, it’s time to have a quick glimpse of the shortcomings or consequences of a map network drive.
- Need a strong authentication mechanism to protect data from any sort of breaching.
- Lack of internet means no file access and smooth workflow.
- Loss of data in case of hardware failure or power outages.
- Need periodical maintenance of the network drive.
Conclusion
In this blog post, we discussed various aspects of a map network drive. Ranging from its meaning to pros and cons, we highlighted everything. Moreover, we also shared multiple answers for “how to map a network drive” according to different computer operating systems. Thus, we hope that this article positively resolved all your queries and gave you enough knowledge of the topic.
FAQs
What is the difference between a cloud storage and a network drive?
Cloud storage is basically an online space which allows access to files, formats, and programs from anywhere. A 3rd party service provider manages it. On the other hand, a network drive is an in-built storage locally placed in a computer system, accessible by a network from a specific location only.
What are the benefits of mapping network drives?
It simplifies data management, allows working remotely, takes regular backups, connects various systems to the same network, and decreases the load of file duplication.
What are the elements of a map network drive?
The three core elements of a map network drive are drive, drive technology, and drive access protocol.


